PND Delta Candles
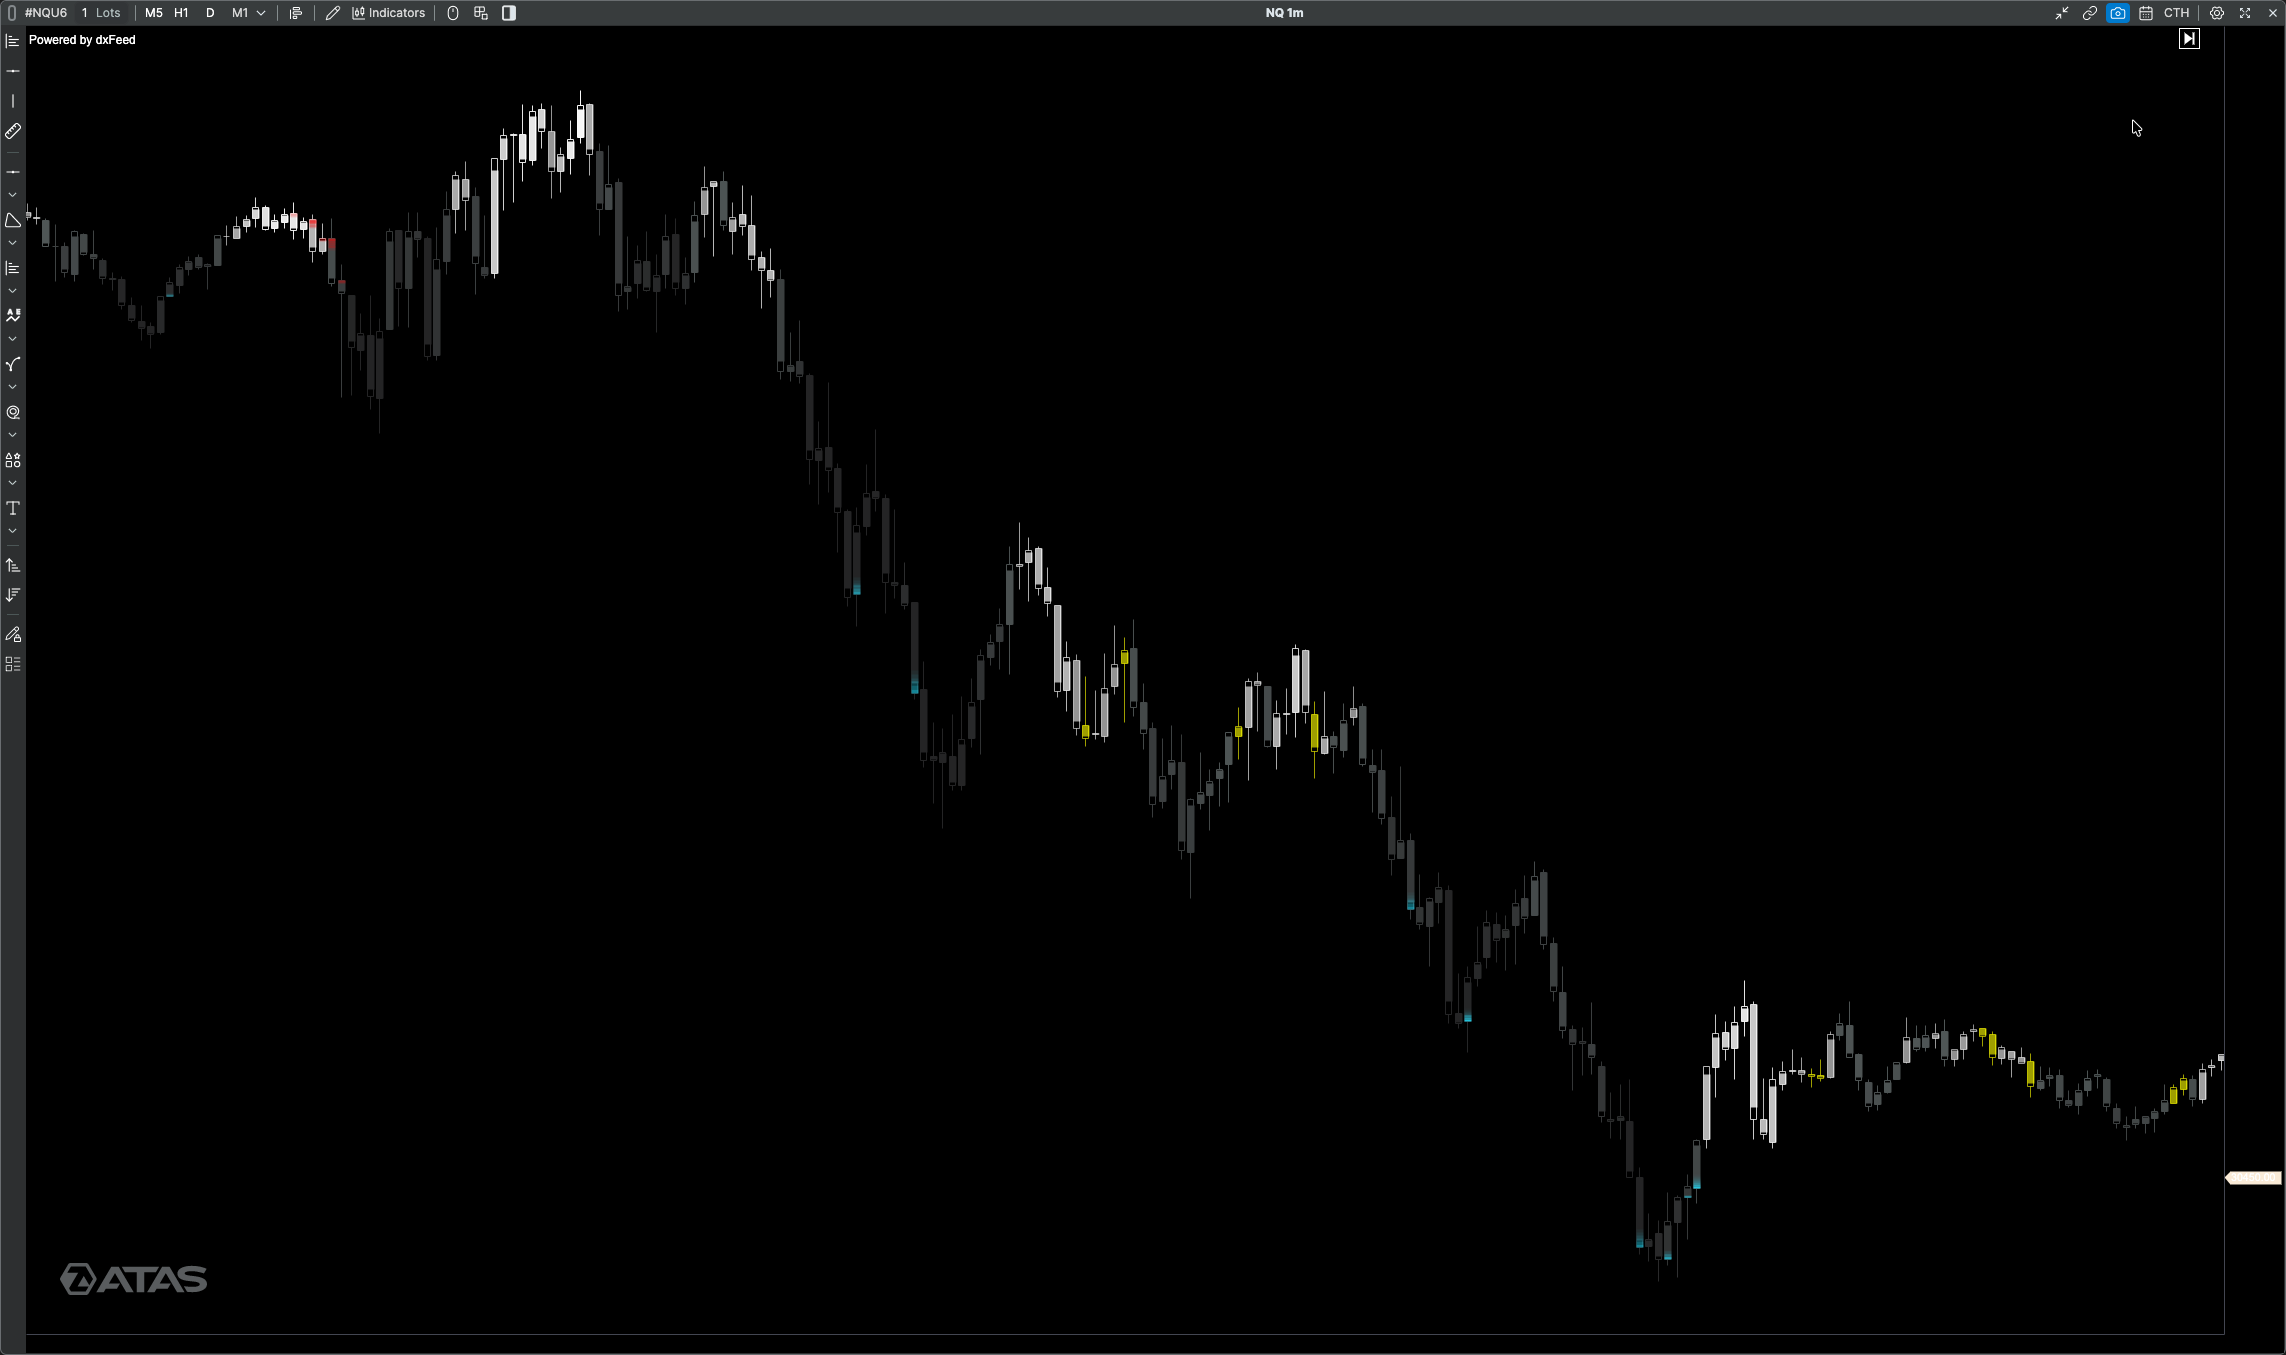
Custom hollow candles colored by a blend of CVD and price displacement, plus tiered InertiaTick glow signals when price gets overextended. Three signals in one visual — with a statistical 7-bar timeout marker for long-side reversals.
What it does 📊
The three signals — in one indicator
The indicator runs three independent calculations and weaves them into a single chart visual. Each tells you something different about the same bar — flow direction, actual price travel, and whether the market is overextended.
close[bar] − close[bar−N]. Session-anchored, so it never crosses midnight. Combined 50/50 with CVD so disagreement (flow up, price flat) drags the candle toward neutral instead of falsely signaling conviction.How the candle color is calculated — step by step
close[bar] − close[bar−N]
to −1 → +1
= combined signal
Max = avg × 2.0
(earlier color)
per direction
The combined CVD + Displacement reading runs through the same adaptive threshold engine as the original indicator — neutral fraction (0.15) sets the amber zone, max multiplier (2.0) caps full intensity, and the power curve (0.7) shapes how quickly mid-range values reach noticeable color.
Adaptive threshold diagram — neutral zone and gradient range
Color gradient
Mock chart — candle color states
InertiaTick glow — the overextension layer
A separate rendering pass draws a colored glow on the top or bottom third of the candle body when the Inertia X oscillator exceeds a z-score threshold. The glow tells you price has moved too far, too fast — and is therefore more likely to mean-revert.
The 7-bar timeout marker
Use it as a time-based stop: if you take a long after a medium or bright bottom glow and price hasn't shown a real reaction by the marker, you can step aside without waiting for a hard stop-out. Dim glows do not get the marker — the statistical edge is concentrated in the medium and bright tiers.
Toggle with Show marker on bottom-glow bars. The forward distance is configurable (Timeout — bars forward, default 7). Marker color is independently themable.
Direction stripe — reading the candle body
Stripe fills the bottom portion (open side).
Hollow space is at the top (close side).
Stripe fills the top portion (open side).
Hollow space is at the bottom (close side).
Min Stripe Ticks (1) — Minimum height in ticks, so tiny-body bars still show a visible stripe.
All settings — quick reference
| Setting | Default | What it controls |
|---|---|---|
| 1. Price Displacement | ||
| Enable displacement coloring | ON | Master switch for the displacement signal. ON = blend CVD + price displacement 50/50. OFF = CVD-only coloring (identical to the original PND Delta Candles indicator). |
| Displacement period (bars back) | 15 | Lookback for close[bar] − close[bar−N]. Session-anchored — never crosses midnight. Best kept equal to the CVD Period below so both signals cover the same window. |
| Draw candles behind other indicators | OFF | ON = candles render in the chart background so other indicators (heatmaps, footprints, volume profile) paint on top. Useful when this is a context layer, not the primary visual. |
| 2. Delta | ||
| Period (bars to sum) | 15 | Rolling window for summing CVD. On a 1m chart, Period=5 ≈ 5-min flow, Period=15 ≈ 15-min flow. Higher = smoother. Lower = more reactive. |
| 3. Adaptive Thresholds | ||
| Lookback period | 60 | Bars used to compute the rolling average for the adaptive normalization baseline. Lower = adapts faster. Higher = more stable. |
| Neutral zone (× avg) | 0.15 | Fraction of avg combined signal where the bar shows amber. Raise toward 0.3–0.5 to only show directional color on stronger readings. Lower toward 0.05 to color nearly every bar. |
| Max intensity (× avg) | 2.0 | Multiple of avg at which gradient reaches full strength. Lower to 1.5 in fast markets. Raise to 3.0 if you only want full color on extremes. |
| 4. Colors | ||
| Bull soft | #88FFFFFF | Low-intensity bull color (just above the neutral zone). |
| Bull strong | #FFFFFFFF | Full bull intensity (combined signal ≥ max threshold). |
| Bear soft | #FF505757 | Low-intensity bear color. |
| Bear strong | #FF242425 | Full bear intensity. Near-black by design. |
| Neutral | #9EFFFF00 | Amber neutral — combined signal within the neutral zone, or signals conflict. |
| 5. Gradient | ||
| Power curve | 0.7 | Exponent on the normalized intensity. <1 pushes color out earlier; =1 is linear; >1 keeps bars soft until near max. |
| 6. Candle Body | ||
| Body fill | #00000000 | Optional fill color inside the candle body. Default alpha=0 = fully hollow. Set a non-zero alpha for a translucent filled body. |
| 7. Direction Stripe | ||
| Stripe height (fraction) | 0.9 | What fraction of the body height the direction stripe occupies. Lower to 0.3–0.5 for a subtle accent. |
| Minimum stripe ticks | 1 | Minimum stripe height in ticks, regardless of body size. Ensures small-body bars still show a distinguishable stripe. |
| 8. Inertia V2 Glow | ||
| Enable glow | ON | Master toggle for all InertiaTick glow rendering. Off = pure delta-candles behavior with no overextension layer. |
| Dim threshold | 1.2 | z-score above which a dim-tier glow appears. Lower = more dim glows; higher = fewer. |
| Med threshold | 1.7 | z-score for the medium-tier glow — and the trigger for the 7-bar timeout marker on bottom glows. |
| Bright threshold | 2.4 | z-score for the bright (strongest) tier. Rare; reserve for high-conviction overextension reads. |
| Top glow color | #F59E0B | Amber — color for overextended-UP glows (short-side context). |
| Bottom glow color | #22D3EE | Cyan — color for overextended-DOWN glows (long-side reversal setup). |
| Glow coverage (% of body) | 33% | How much of the candle body the glow covers (top or bottom third by default). Raise for a stronger visual presence; lower for a subtle hint. |
| Alpha — dim | 80 (~31%) | Opacity for dim-tier glows. |
| Alpha — med | 160 (~63%) | Opacity for medium-tier glows. |
| Alpha — bright | 230 (~90%) | Opacity for bright-tier glows. |
| Short-side opacity scale | 0.5 | Top (short) glows render at this fraction of their normal alpha. Calibrated for the historically weaker short edge in the indices — raise to 1.0 if your asset behaves symmetrically. |
| Gradient steps | 8 | Number of gradient bands in the glow fade. Higher = smoother fade, slightly more rendering cost. |
| 9. Inertia X Math | ||
| RVI period | 10 | Donald Dorsey Relative Vigor Index period — the inner momentum oscillator that feeds Inertia X. |
| Linear Regression period | 14 | LinReg smoothing applied to RVI output before std-dev normalization. |
| Standard Deviation period | 10 | StdDev window used to normalize the smoothed-RVI ratio. |
| Z-score window | 50 | Rolling window for z-scoring the raw inertia value. Smaller = more reactive; larger = steadier. |
| Orderflow avg window | 50 | Window for the volume weight, tick weight, and quality gate averages. |
| Price/Delta blend α | 0.6 | Weight of price-based inertia vs CVD-based inertia. 0 = CVD only, 1 = price only. |
| 10. 7-Bar Timeout Marker | ||
| Show marker on bottom-glow bars | ON | Draws a dotted line + triangle a fixed number of bars ahead of every medium or bright bottom glow. |
| Timeout (bars forward) | 7 | How many bars forward the marker is placed. Default 7 matches the 4-year NQ backtest reversal window. |
| Marker color | Cyan (80%) | Color of the timeout marker line + triangle. |
Setting the Period for different timeframes
Both the CVD Period and the Displacement period control the same N-bar window for their respective signals. Keep them equal so both signals describe the same time horizon. On a 1-minute chart, each bar = 1 minute, so Period ≈ minutes of flow.
| Timeframe goal | On 1m chart | On 5m chart | Lookback suggestion |
|---|---|---|---|
| Intrabar / scalp | Period = 3 | Period = 1 | Lookback = 20–30 |
| 5-minute flow | Period = 5 | Period = 1 | Lookback = 30–50 |
| 15-minute flow (default) | Period = 15 | Period = 3 | Lookback = 60 |
| 30-minute flow | Period = 30 | Period = 6 | Lookback = 80–100 |
| Hourly bias | Period = 60 | Period = 12 | Lookback = 120+ |
Tip: Run two instances side by side — one at Period=5 for scalp reads, one at Period=15 for bias direction. When both agree, conviction is higher.
Get up and running in 3 minutes
The indicator is distributed as a single compiled .dll file — all three signal layers (candle coloring, InertiaTick glow, 7-bar marker) install together. No coding required.
atas.net — download →
PNDDeltaCandlesInertia.dll.Windows:
%AppData%\ATAS\Indicators\macOS:
~/Library/Application Support/ATAS/Indicators/PND Delta Candles, and add it to any chart.